

10 Creative Ways to Dye Easter Eggs
Well, we already decorated our homes for the Easter holidays and chose the Easter dinner menu. Now, let’s move to the most joyful and colorful part of the preparations for the holiday – dying the eggs!
The tips for decorating the eggs are thousands, the market offers different paints, techniques, accessories, or you can also try natural paints from herbs and vegetables. Whatever you will choose, the most important thing is to use your imagination and to follow your art call.
Here, we will present you our 10 most favorite ways to make beautiful Easter eggs:
1. Marbled Easter Eggs – To get the beautiful marbleized effect, all you will need is a whipped cream and food coloring. Get a small tray and spread a 2cm layer of whipped cream on the bottom, then add several drops of food coloring. Be generous — the more you use, the brighter your eggs will be. Then use a toothpick to swirl and marble your food coloring droplets. Pick us a hard-boiled egg and roll it in the cream, coating it completely. Leave it on a paper towel for 20minutes to dry and then wipe off the remaining cream with clean paper towel. The result is magical!
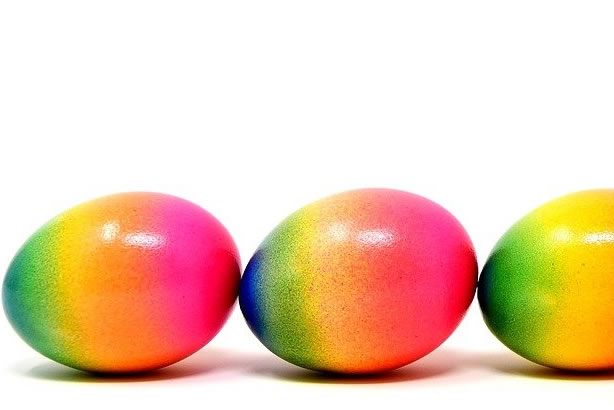
2. Ombre Easter eggs – You can create this dramatic result with one color, dividing it into several bowls with different intensity of the paint. Then, submerge a hard-boiled egg in each bowl. Steep for five minutes, or until you’re happy with the hue, then remove and place in an empty egg carton to dry.
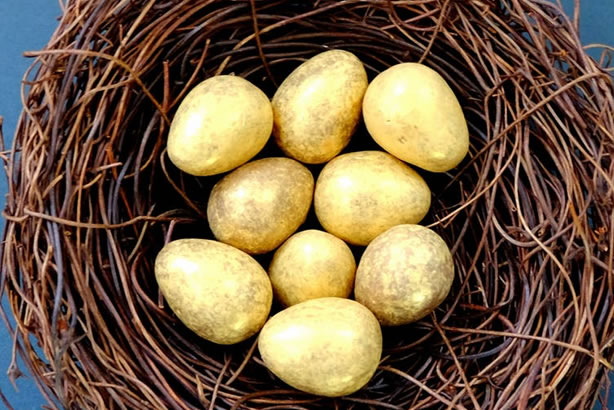
3. Gold Leaf Easter Eggs – you will need gold leaf sheets and adhesive, paint brushes, and of course hard-boiled eggs and a pencil. You can cover all your egg with the gold leaf, or just a small part in the form of bunny, heart, or whatever you wish. Just scratch it with the pencil and start creating When you are ready with the design, use the brush to put some glue and place a sheet of gold leaf over the top. Lightly tap on it to fix it. This technique needs more time and effort, but the result is always stunning! You can also do this on wooden eggs for a decoration that will last a little longer
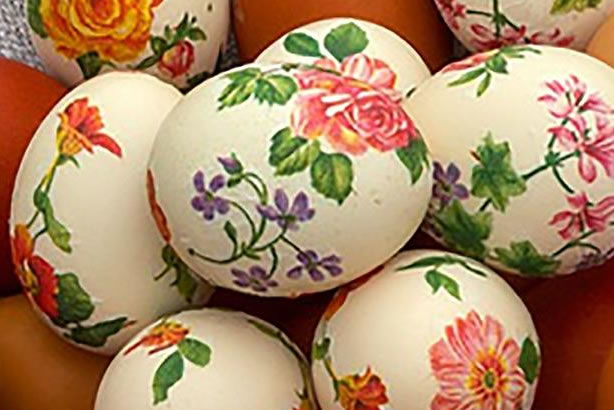
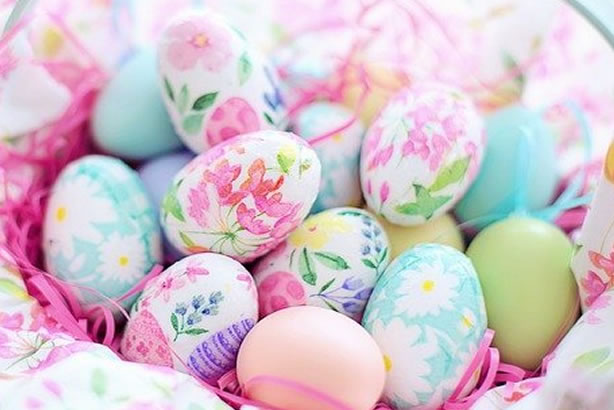
4. Decoupage Easter Eggs – this is one very simple, yet extremely stunning technique. You need s napkin or fabric, paint brush, Mod podge glue and eggs You can use white eggs, or paint them in the color you want. Cut the part or your napkin/fabric that you want to use and put it on the egg with on a thin layer of glue. Let them dry for an hour and then you’re done. These eggs do great for home decoration – on the table or on the Easter tree.
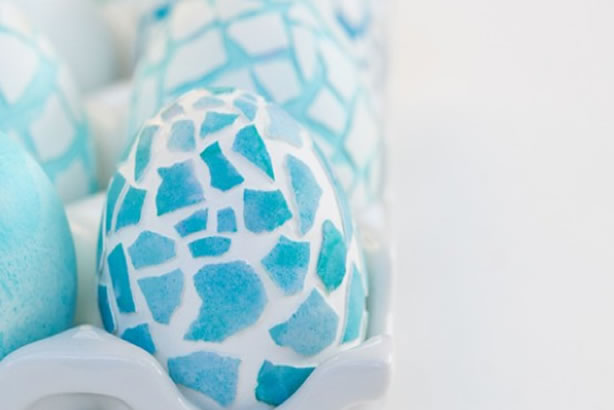
5. Mosaic Easter Eggs – paint some eggs and leave some of them white. Peel the painted and keep the shells. For this design we use small pieces of egg shells and glue it to a whole egg. We like to use different color shades on the top and white egg as a base. Here the variants are numerous, you just need a little patience and imagination
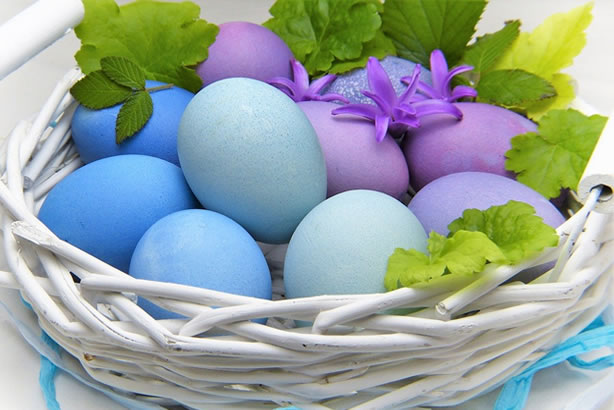
6. Natural-Dye Easter Eggs – use ingredients from your kitchen and make natural colored eggs. Here the secret is to soak the eggs for longer, if you want brighter and deeper color. Leave for at least 30 minutes, some delicate colors like orange even for overnight. Put water and vinegar in a pot, bring it to a boil and then add your dye ingredients for the egg color of your choice. Lower the heat and let simmer for 30 minutes. Let cool, strain and add the eggs for at least 30minutes. For red color, use beets, for yellow – onion skins or turmeric, for blue – purple cabbage or blueberries, for green – spinach leaves.
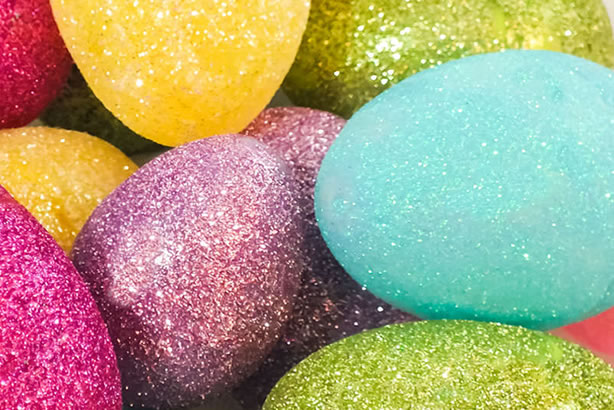
7. Crystal Easter Eggs – whatever technique you choose for coloring your eggs, marble effect or solid color, you can easily make them look cooler by covering them in small crystals. To make, paint one part of an egg with craft glue and sprinkle with clear iridescent glitter. Let dry. You can make this way the whole egg, by and repeating this on the two sides.
8. Nail Polish Easter Eggs – the secret to the perfect mélange? Swirl some nail polish in water and dip the egg in the mixture. Or take a paint brush and let your imagination do the rest! Don’t forget to use these eggs only for decoration!
9. Cotton Multi color Easter Eggs – use a cotton roll and sprinkle it all over with different colors of egg paint. Mix the colors freely to get beautiful combinations. Then put the hard-boiled egg still warm and pack it with the cotton roll. Leave for 20minuts and then unroll to see the stunning results.
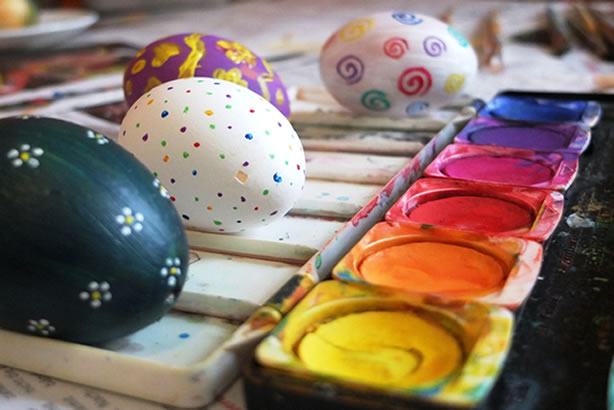
10. Watercolor Easter Eggs – this is great technique to try with your kids. All you need is a set of watercolor paints, water and a brush to paint great eggs
Did you learn something new? We will be happy to hear your favorite techniques for decorating Easter eggs!